



News
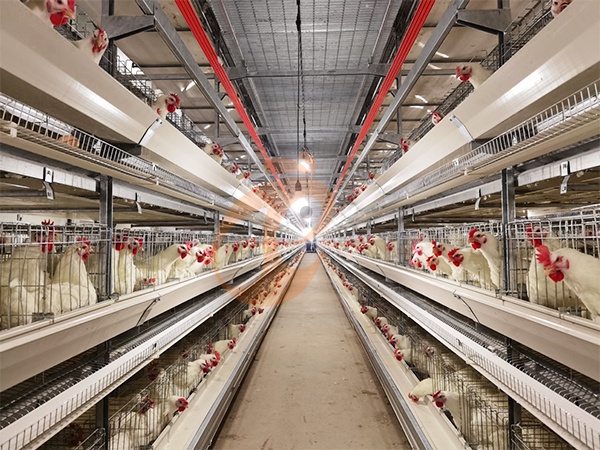
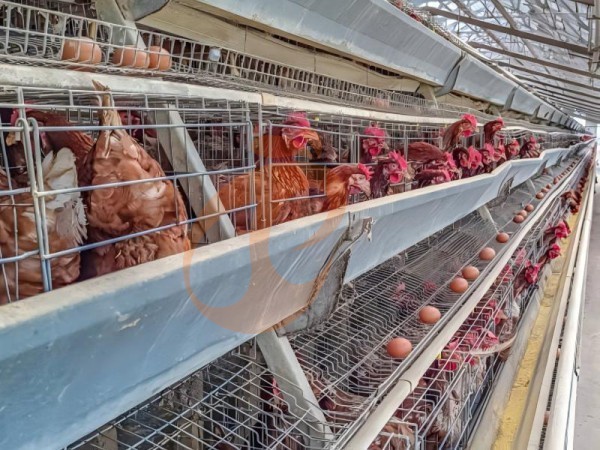
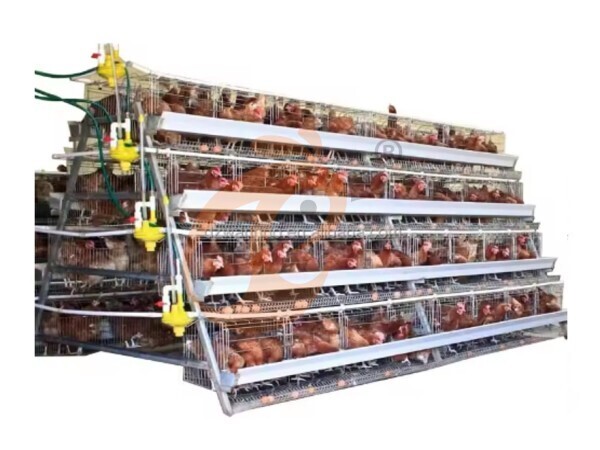
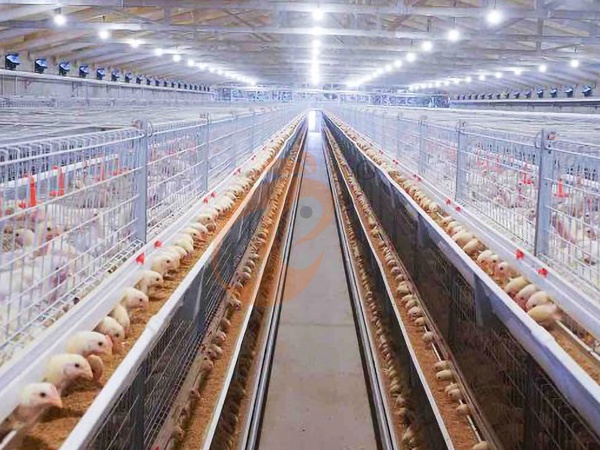
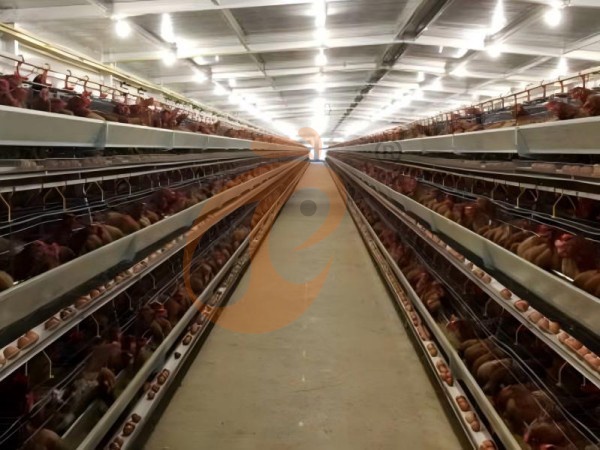
- A type battery cage system installation combines structural preparation, equipment layout, utilities, and commissioning for efficient layer production, with practical planning covering 12–18 m house widths and 60–120 m lengths.
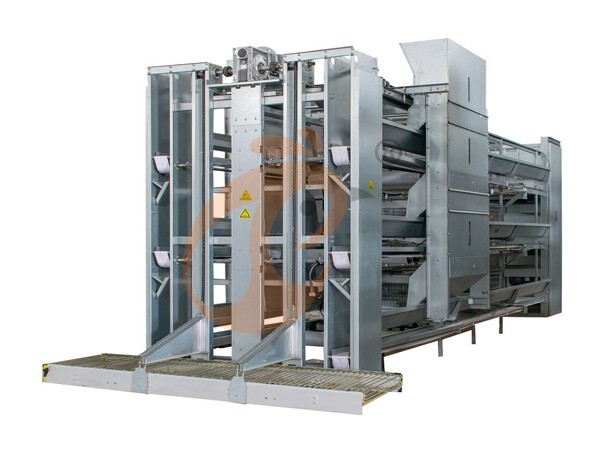
Professional cage engineering coordinates feeding, drinking, manure removal, egg collection, ventilation, and electrical systems through one integrated poultry equipment configuration.
Accurate surveying, foundation preparation, and alignment protect equipment performance while supporting installation tolerances of ±5 mm per 10 m.
Automated poultry-house planning can reduce installation conflicts and create clearer maintenance routes around commercial layer equipment.
- A complete supplier solution connects customized design, manufacturing, installation guidance, commissioning, operator training, and after-sales technical support for scalable farm development.
Get professional poultry farm construction guidance, equipment selection solutions, and the latest price lists, whatsApp to +8618830120193, click to learn more:
Installation Overview: A Practical Requirement Checklist
Installing an A type battery cage system requires coordinated planning of the poultry house, structural foundation, feeding, drinking, manure, egg collection,
ventilation, and electrical systems.
A commercial installation should also reserve ≥600 mm maintenance clearance around designated service points and maintain ±3 mm installation tolerance
for critical cage alignment.
Guideline One: Start With The Poultry House, Not The Cage
A common installation mistake is selecting the cage system first and checking the building afterward.
The correct process is the opposite, with an A type layer chicken cage layout developed from actual building conditions.
Before manufacturing or installation, measure the poultry house accurately.
Check the usable length, internal width, ceiling height, column positions, doors, windows, ventilation openings, and floor elevation.
For accurate layout development, record column coordinates to ±10 mm and verify the building diagonal difference within ≤20 mm.
For commercial poultry producers, this step also creates an opportunity to optimize stocking capacity.
A professional equipment supplier should provide a customized layout rather than forcing a standard configuration into every building.
The goal is simple: maximize usable poultry-house space without compromising bird access, ventilation, or equipment maintenance.
Poultry House Dimensions: What Must Be Confirmed?
The following dimensional information should be confirmed before equipment delivery.
Data is for reference only.Swipe horizontally to view full table.
Accurate measurements at this stage prevent expensive modifications later.
A digital layout should preferably be completed before fabrication, with CAD drawing scale 1:100 and revision-controlled equipment dimensions.
Guideline Two: Think In Terms Of The Complete Production System
An A type battery cage system performs best when supporting equipment is planned at the same time.
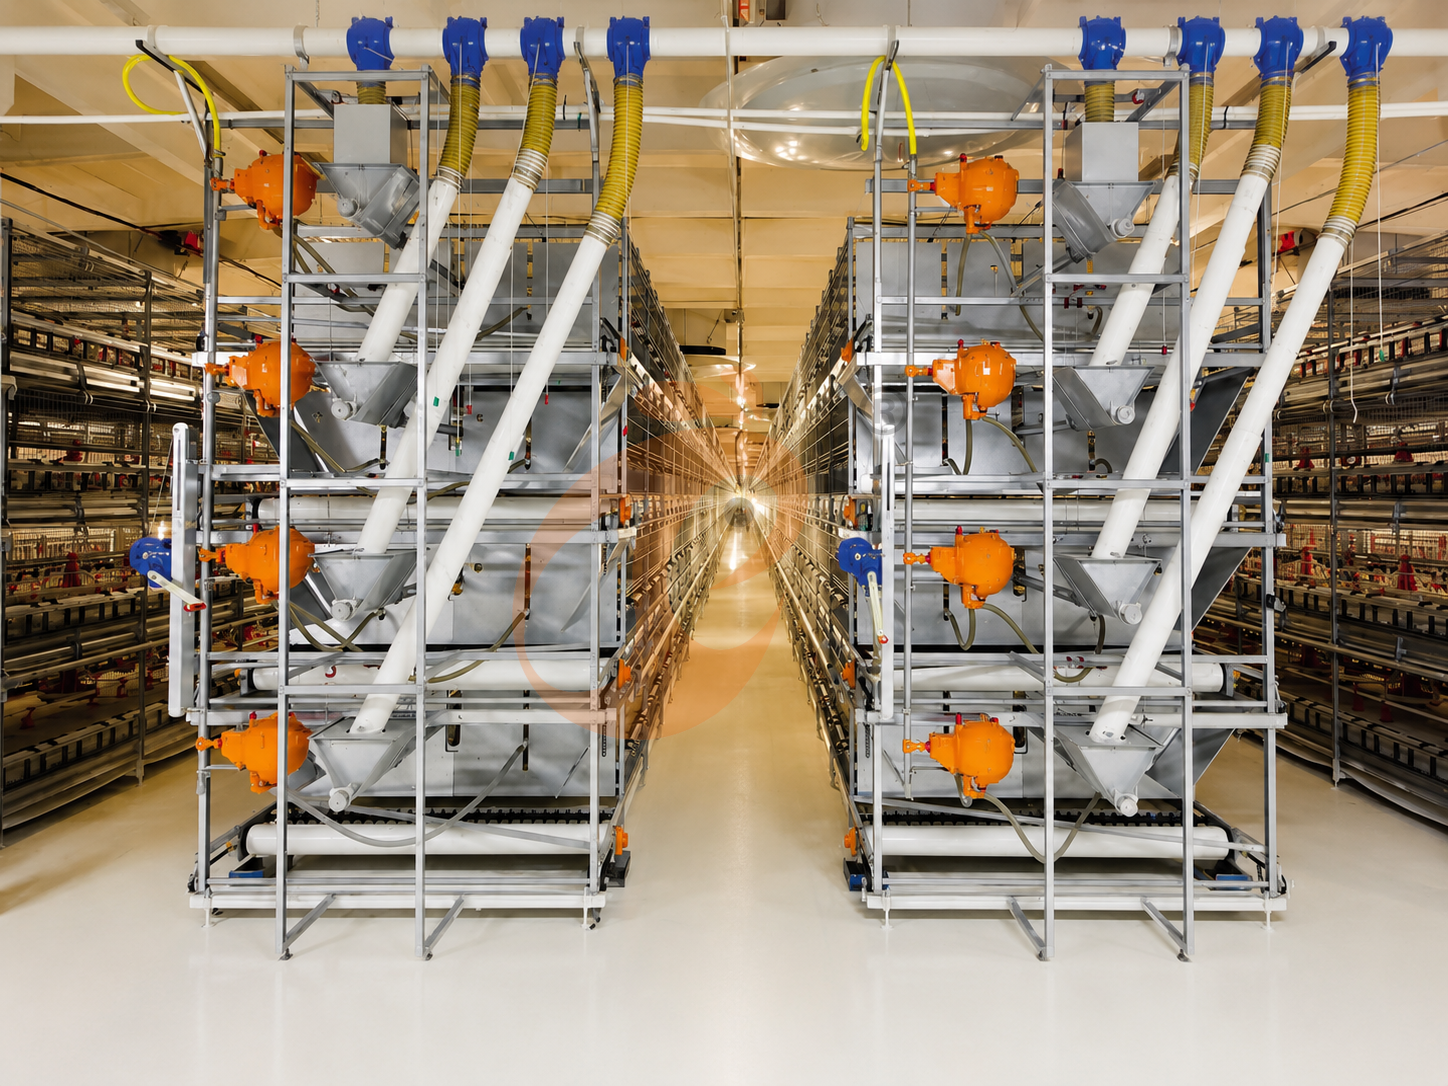
Instead of treating the cage, feeder, drinker, manure system, and egg collection as separate products, consider them one integrated production line.
Cage dimensions influence feeder placement.
Feeder placement affects service access.
Manure equipment determines clearance beneath the cages.
Ventilation influences stocking density and house arrangement.
For large commercial projects, synchronized equipment planning can also simplify electrical installation.
A centralized control architecture with IP54-rated control enclosures and 24 VDC sensor circuits can make inspection and troubleshooting more convenient.
This integrated approach is particularly valuable for large poultry farms.
When all components are designed together, installation becomes faster, operation becomes smoother, and the risk of equipment interference is significantly
reduced.
Equipment Compatibility Table: Build The System Around The Cage
Data is for reference only.Swipe horizontally to view full table.
A complete equipment package can therefore provide more value than purchasing individual components from multiple suppliers.
For project commissioning, supplier documentation should include motor rated-current data and cable cross-section recommendations for every powered
component.
Guideline Three: Floor Preparation Determines Installation Quality
Think of the floor as the foundation of the entire cage system.
If the concrete floor is uneven, damaged, or insufficiently strong, installers may struggle to maintain consistent cage alignment.
Even small deviations can become more noticeable across a long cage row.
Before installation, remove debris, repair cracks where necessary, and verify floor levelness.
Mark the cage-row centerlines according to the approved layout drawing.
Anchor points should then be positioned accurately.
For automatic feeding and manure removal, precision is even more important because moving components require proper alignment.
During preparation, keep anchor drilling depth at ≥80 mm where specified by the fixing design and maintain ≥100 mm edge distance from concrete boundaries.
A stronger installation foundation means fewer adjustment problems during commissioning.
Floor And Structural Preparation: Pre-Installation Table
Data is for reference only.Swipe horizontally to view full table.
This preparation should be completed before equipment arrives at the farm.
A documented pre-installation inspection time of 24–48 hours allows the supplier and installation team to resolve structural discrepancies before assembly begins.
Guideline Four: Installation Is Also An Airflow Design Decision
A high-density poultry house cannot rely on cage installation alone.
Air movement must be considered while arranging cage rows.
Cages should not block air inlets, exhaust fans, evaporative cooling equipment, or service passages.
The final layout should allow fresh air to move through the occupied zone while helping remove heat, moisture, dust, and harmful gases.
This is where experienced poultry equipment manufacturers add practical value.
A supplier familiar with complete poultry-house projects can coordinate cage placement with ventilation and environmental-control equipment rather than treating each system independently.
During commissioning, environmental sensors should be positioned at representative bird-zone locations, with temperature measurement accuracy of ±0.5°C and relative-humidity accuracy of ±3% RH.
Good equipment layout is therefore not only about fitting more cages—it is about creating a better production environment.
Ventilation, Water, And Electrical Requirements
Data is for reference only.Swipe horizontally to view full table.
All utility systems should be checked before commissioning the poultry equipment.
Electrical panels should maintain ≥1.0 m front operating space, while water pipelines should receive pressure testing at 1.5× working pressure before birds are
introduced.
Guideline Five: Use A Commissioning Sequence, Not Trial And Error
A professional installation should follow a defined sequence.
First: inspect the cage frame and anchors.
Second: verify row alignment and tier positioning.
Third: install feeding and drinking equipment.
Fourth: connect manure and egg-handling systems.
Fifth: complete electrical and control connections.
Sixth: test every moving and water-delivery component before placing birds into the cages.
During commissioning, automatic equipment should operate continuously for 30 minutes without abnormal vibration, blockage, or overheating before acceptance.
Water delivery should also be checked at the terminal point, with pressure variation kept within ±10% across the tested line.
This sequence helps identify installation problems while access is still easy.
It also reduces the risk of discovering alignment or electrical issues after the house is already stocked.
Six Clear Guidelines: Installation Summary
Data is for reference only.Swipe horizontally to view full table.
Following these six guidelines can significantly reduce installation errors and improve long-term equipment reliability.
A formal acceptance record should document motor current deviation within ±10% of rated current and confirm each equipment subsystem before production begins.
Why Choose A Professional A Type Battery Cage Supplier?
The installation requirements of an A type battery cage system reveal an important point: the quality of poultry equipment is only one part of a successful project.
Engineering support, layout design, system compatibility, installation guidance, and after-sales service are equally important.
A professional poultry equipment manufacturer should be able to help customers move from house measurement → system design → equipment manufacturing → installation → commissioning → production support.
Data is for reference only.Swipe horizontally to view full table.
For poultry farms seeking higher automation and better labor efficiency, an A Type Battery Cage System can become the foundation of a complete modern layer-farming solution.
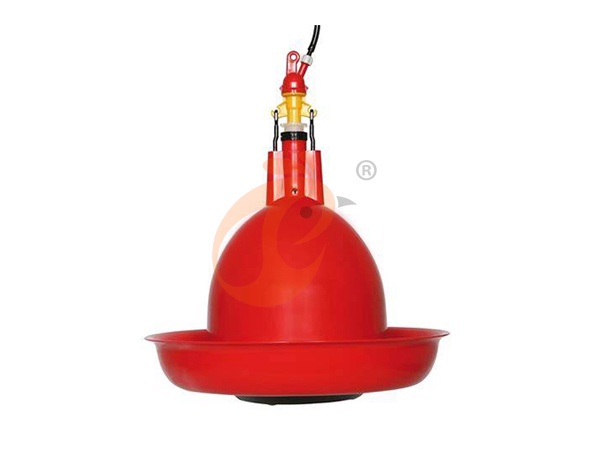
When the cage system is correctly matched with automatic feeding, nipple drinking, manure removal, egg collection, ventilation, and environmental control, the result is more than a cage—it is an integrated production system designed for efficient commercial egg production.
Before placing an order, ask your supplier for a customized poultry-house layout, equipment configuration, installation drawings, utility requirements, and commissioning guidance.
Choosing the right equipment partner at the planning stage can help your farm avoid costly modifications and achieve a more reliable, efficient, and scalable poultry operation.
Frequently Asked Questions
Q1: What building information is needed before installing an A type battery cage system?
House length, width, clear height, column locations, doors, floor conditions, ventilation openings, and utility positions should be supplied before layout confirmation.
Q2: How should automatic equipment be commissioned before bird placement?
Feeding, drinking, manure, egg collection, electrical controls, and moving mechanisms should be tested systematically, with each operating cycle recorded before stocking.
Q3: Why is customized equipment layout important for commercial layer farms?
Customized planning prevents interference between cage rows and supporting systems while coordinating structural conditions, airflow, maintenance access, and automation requirements.
Taiyu (HK) Group - One Of China Toppest A Type Battery Cage System Manufacturer
A type battery cage system integrates cage structure, layer production planning, and compatible poultry equipment into a coordinated commercial installation solution with engineering-based configuration.
Global factory-direct supply connects cage manufacturing, poultry equipment integration, quality inspection, technical documentation, and international project delivery through one engineering source.
Turn-key projects cover site assessment, system design, equipment production, installation coordination, commissioning, operator training, and after-sales technical support.
Project configurations can be developed for new poultry houses, farm upgrades, and large-scale commercial layer facilities requiring coordinated automation and equipment interfaces.
Factory engineering teams support production scheduling, component selection, installation documentation, spare-parts planning, and technical communication throughout international poultry equipment projects.
Contact Us To Received Your Customized Poultry Farm Plan
Headquarters And Branchs
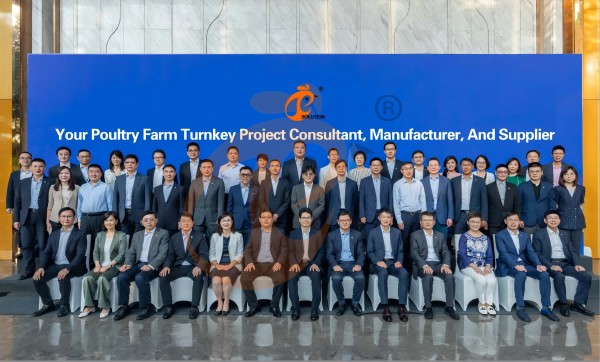
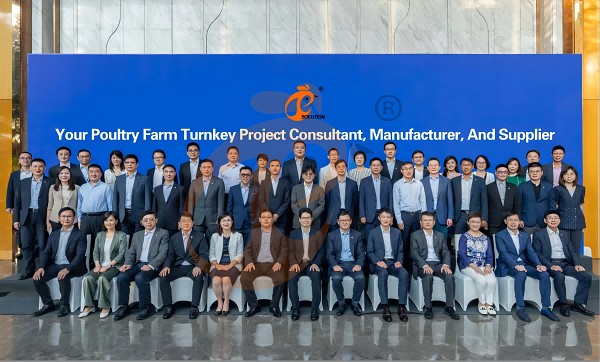
Hong Kong Headquarter Management Team
Hong Kong Headquarter Taiyu Industrial Group CO., LTD
China Hebei Best Machinery And Equipment CO., LTD
Nigeria Vanke Machinery And Equipment CO., LTD
Tanzania Best Machinery And Equipment CO., LTD
Ethiopia Best Hebei Machinery Manufacturing PLC
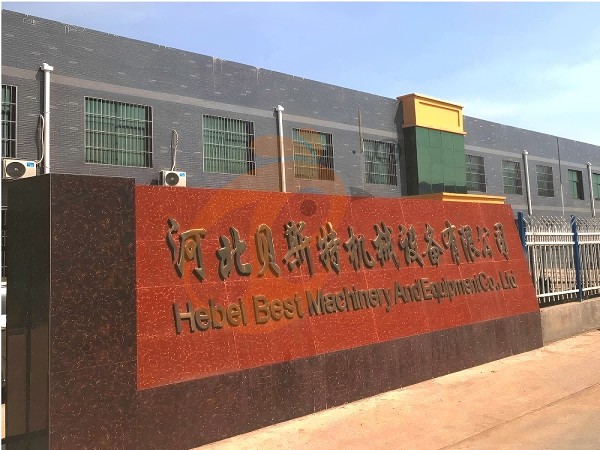
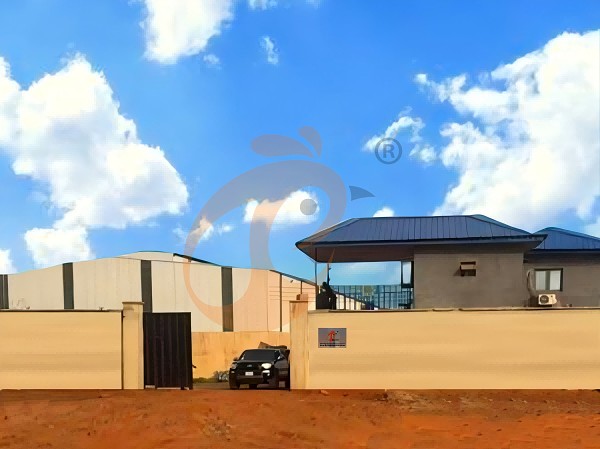
Reception /24 WhatsApp NO. : +8618830120193
FAQ
What Are The Advantages Of A-Type Poultry Cage For Medium-Sized Farms?
Farm capacity per house: 10,000–50,000 birds
Egg production rate: 90–96%
FCR: 1.9–2.2
Labor savings: 50–70%
How To Reduce Egg Breakage Rate In A-Type Layer Cage Farms?
Control conveyor speed
Egg breakage rate <1%
Daily egg yield: 900–960 eggs/1,000 birds
Egg production rate: 90–96%
How To Improve Egg Production Stability In A-Type Layer Cage System?
Scheduled feeding and drinking
Temperature 20–25°C, humidity 50–60%
Egg production rate: 90–96%
FCR: 1.9–2.2
- layer chicken cage
- poultry equipment
- chicken cage
- poultry farm
- battery cage
- layer farm
- layer equipment
- poultry house
- poultry equipment manufacturers
- poultry equipment manufacturer
- commercial layer farm
- poultry farm construction
- battery cage system
- poultry house dimensions
- battery cage supplier
- commercial layer equipment
- poultry equipment project
- Tanzania
- Nigeria
Product Recommendations
 Imported Vs Local H Type Chicken Battery Cages: Which Offers Better Quality?1. H Type Chicken Battery Cage layouts require coordinated house dimensions
2. Multi-tier cage structures support organized commercial layer production
3. Automatic systems connect feeding, drinking, manure, and egg handling
4. Engineering drawings define interfaces before equipment manufacturing begins
5. Reception /WhatsApp NO. : +8618830120193Read more A Type Battery Cage For Layers Vs Broilers: Which System Is More Suitable?1. A Type Battery Cage requires coordinated structural and utility planning
2. Layer housing layouts determine equipment positioning and service access
3. Automatic feeding reduces repetitive manual feed distribution work
4. Manure handling requires suitable conveyor or scraper interfaces
5. Reception /WhatsApp NO. : +8618830120193Read more 5 Practical Methods To Reduce Noise From Pralson Feeders1. Pralson feeders connect feed delivery with mechanical alignment requirements
2. Poultry houses require coordinated suspension and drive arrangements
3. Noise inspection should follow measurable mechanical checkpoints
4. Feeding performance depends on compatible component configuration
5. Reception /WhatsApp NO. : +8618830120193Read more Deep Litter System For Broiler Chickens | 7 Daily Checks1. Deep litter management depends on coordinated ventilation and drinking equipment
2. Daily inspections connect measurable house conditions with equipment operation
3. Feeding, water, airflow, and automation should follow synchronized procedures
4. Equipment specifications should match building dimensions and flock capacity
5. Reception /WhatsApp NO. : +8618830120193Read more Free Range System For Broiler Chickens | 7 Daily Management Checks1. Free-range houses require coordinated feed and water distribution systems with defined equipment layouts
2. Ventilation settings should reflect outdoor temperature and house dimensions through controller-based adjustments
3. Automatic doors require reliable scheduling and mechanical inspection procedures for consistent daily access
4. Daily records support preventive maintenance and equipment troubleshooting across interconnected farm systems
5. Reception /WhatsApp NO. : +8618830120193Read more Standard Vs Custom Broiler Chicken Cage Systems | Which Fits Your Farm?1. Standard cage systems use established component dimensions for conventional poultry houses.
2. Custom cage systems adapt equipment arrangements to actual building geometry and operating requirements.
3. Feeding and drinking equipment should be coordinated with cage placement during engineering.
4. Manure removal equipment should be planned before final equipment installation.
5. Reception /WhatsApp NO. : +8618830120193Read more Broiler Chicken Cage For Sale | 5 Key Factors Buyers Must Check1. Cage layouts require accurate building dimensions before equipment configuration begins
2. Feeding circuits should align with row lengths and service passages
3. Water systems need filtration and pressure control before commissioning
4. Manure conveyors require accessible inspection points for routine maintenance
5. Reception /WhatsApp NO. : +8618830120193Read more Nipple Drinker With Cup Vs Without Cup | Which Reduces Spillage?1. Nipple systems maintain consistent water access during poultry production stages
2. Cup designs help manage moisture around drinking locations effectively
3. Farm layouts influence equipment selection and installation methods
4. Different bird categories require suitable drinking system configurations
5. Reception /WhatsApp NO. : +8618830120193Read more Pellet Machine Energy Saving | 6 Effective Techniques1. Pelletizing efficiency depends on coordinated material preparation and conditioning
2. Stable feeding reduces unnecessary load fluctuations during production
3. Die and roller maintenance supports consistent mechanical compression
4. Cooling and screening protect finished pellet quality after compression
5. Reception /WhatsApp NO. : +8618830120193Read more Deep Litter Broiler System Investment Guide | 5 Decision Tips1. Deep litter housing requires accurate equipment positioning before installation
2. Ventilation calculations should match house volume and climate conditions
3. Feeding lines require progressive height adjustment during bird growth
4. Water systems need filtration and pressure control for stable delivery
5. Reception /WhatsApp NO. : +8618830120193Read more Free Range Broiler System Investment Guide | 5 Decision Tips1. Free-range broiler housing requires coordinated indoor production management
2. Automatic feeding reduces routine manual feed distribution work
3. Ventilation design depends on house volume and climate
4. Nipple drinking requires controlled pressure and regular inspection
5. Reception /WhatsApp NO. : +8618830120193Read more Floor Rearing Broiler Farming Profit | 6 Key Factors Explained1. Floor rearing systems require coordinated airflow and feeding equipment
2. Broiler houses need consistent water access throughout cycles
3. Environmental sensors provide measurable operating conditions for controllers
4. Maintenance schedules help prevent equipment-related production interruptions
5. Reception /WhatsApp NO. : +8618830120193Read more Turnkey Poultry Equipment Investment | 5 Practical Decision Tips1. Commercial poultry layouts require coordinated equipment positioning
2. Ventilation calculations should precede final equipment quantities
3. Feeding systems require compatible electrical and mechanical interfaces
4. Climate conditions influence cooling and airflow configuration
5. Reception /WhatsApp NO. : +8618830120193Read more Battery Cage For Layers ROI | 5 Practical Profit Analysis Tips1. Battery Cage For Layers layouts require coordinated structural and ventilation calculations
2. Layer cage system dimensions should match building geometry and service access
3. Automatic layer cage system integration depends on compatible mechanical and electrical interfaces
4. Commercial poultry equipment planning should separate capital costs from recurring operating expenses
5. Reception /WhatsApp NO. : +8618830120193Read more Broiler Chicken Cage ROI | 5 Practical Profit Analysis Tips For Investors1. Broiler Chicken Cage layouts depend on actual building dimensions and structure
2. Feed system sizing should follow required production throughput calculations
3. Ventilation specifications should reflect house volume and climate conditions
4. Manure equipment selection should consider line length and drive capacity
5. Reception /WhatsApp NO. : +8618830120193Read more 7 Ways To Prevent Pellet Machine Blockages Quickly1. Pellet machines convert prepared feed into uniform compact pellets
2. Stable feeding supports consistent compression throughout production
3. Conditioning improves material flow before pelletizing begins
4. Die selection connects formulation requirements with pellet dimensions
5. Reception /WhatsApp NO. : +8618830120193Read more A Type Poultry Cage Vs Floor Rearing System: 5 Performance Comparisons1. A Type poultry cage layouts determine equipment positions and maintenance access
2. Feed distribution requires coordinated drive systems and suitable delivery routes
3. Manure removal depends on belt dimensions, motor selection, and discharge planning
4. Environmental controls connect sensors, ventilation equipment, and house conditions
5. Reception /WhatsApp NO. : +8618830120193Read more Poultry Equipment Supplier | 5 Practical Tips To Choose The Right One1. Poultry equipment selection depends on house dimensions and flock capacity
2. Ventilation planning should account for climate and building structure
3. Feeding systems require coordinated capacity calculations before installation
4. Water systems require filtration and pressure checks before commissioning
5. Reception /WhatsApp NO. : +8618830120193Read more Battery Cage For Layers Cost | 6 Key Factors Affecting Price1. Layer cages organize birds vertically within dedicated housing rows
2. Feeding systems distribute feed consistently across cage sections
3. Manure equipment transfers waste toward designated collection areas
4. Water systems regulate drinking supply throughout production rows
5. Reception /WhatsApp NO. : +8618830120193Read more Broiler Chicken Cage Cost | 6 Key Factors Affecting Price And Budget1. Broiler cage projects require coordinated structural and mechanical specifications
2. House dimensions determine cage rows and equipment placement
3. Feeding and drinking systems require compatible connection layouts
4. Environmental systems depend on ventilation and cooling requirements
5. Reception /WhatsApp NO. : +8618830120193Read more How To Maximize Water Efficiency With Nipple Drinkers | 6 Tips1. Nipple drinkers provide controlled water delivery for poultry
2. Pressure regulation supports stable drinking-line operation
3. Filtration helps protect internal nipple components
4. Scheduled flushing removes accumulated line contaminants
5. Reception /WhatsApp NO. : +8618830120193Read more How To Upgrade Pellet Machines | 6 Practical Strategies1. Pelletizing performance depends on coordinated material preparation and mechanical compression
2. Feed moisture and particle size directly influence forming stability
3. Cooling and screening determine finished-product handling characteristics
4. Equipment interfaces should be planned before installation begins
5. Reception /WhatsApp NO. : +8618830120193Read more Poultry Cage Cost Per Bird Vs Total Project Cost: 5 Smart Comparisons1. Poultry cage layouts require accurate building dimensions before equipment production
2. Cage capacity calculations depend on selected housing configuration and tiers
3. Equipment routes should maintain accessible maintenance and service clearance
4. Electrical specifications must match local power infrastructure and motors
5. Reception /WhatsApp NO. : +8618830120193Read more Which H Type Chicken Cage Design Is Best For 20,000+ Layer Poultry Farms?1. H type chicken cage layouts require accurate building dimensions for equipment coordination
2. Automatic feeding routes should align with cage rows and service passages
3. Manure systems require planned access for inspection and scheduled maintenance
4. Egg collection equipment should connect cage rows with central transfer points
5. Reception /WhatsApp NO. : +8618830120193Read more Is Deep Litter System Suitable For Broilers? | 5 Answers1. Proper poultry farming requires stable environmental control mechanisms
2. Modern equipment ensures high animal welfare standards
3. Quality management systems reduce disease risks significantly
4. Reliable automation optimizes feed conversion efficiency daily
5. Reception /WhatsApp NO. : +8618830120193Read more Is Free Range System Suitable For Broilers? | 5 Practical Answers1. Free range broiler houses combine indoor control with outdoor access
2. Feeding equipment maintains predictable daily feed distribution
3. Drinking systems support continuous access to clean water
4. Ventilation equipment manages changing indoor environmental conditions
5. Reception /WhatsApp NO. : +8618830120193Read more Floor Rearing System For Broiler Chickens | 5 Daily Management Checks1. Floor rearing systems require coordinated equipment layouts
2. Feeding lines should align with house dimensions and flock capacity
3. Water systems require filtration, regulation, distribution, and flushing
4. Ventilation systems depend on airflow calculations and building structure
5. Reception /WhatsApp NO. : +8618830120193Read more How To Reduce Operating Costs With Poultry Equipment | 6 Tips1. Feed distribution accuracy supports controlled material allocation across poultry houses
2. Environmental sensors provide continuous measurements for automated equipment adjustment
3. Water monitoring helps identify abnormal consumption and potential system leakage
4. Preventive inspection supports mechanical reliability throughout equipment operating cycles
5. Reception /WhatsApp NO. : +8618830120193Read more A Type Battery Cage Vs Cage-Free System: Which Is More Profitable For Layers?1. A Type Battery Cage layouts require accurate building dimensions before equipment quantities are calculated
2. Feeding systems should align drive capacity with planned row lengths
3. Egg conveyors require coordinated transfer heights between housing and packing areas
4. Manure systems should match belt length, discharge direction, and removal cycles
5. Reception /WhatsApp NO. : +8618830120193Read more Floor Rearing Broiler House Design | 6 Practical Layout Guidelines1. Floor plans should maintain unobstructed routes between production zones and equipment access points
2. Feeder suspension should allow adjustment throughout broiler growth cycles
3. Water pipelines require accessible filtration and pressure-control positions
4. Ventilation components should align with calculated airflow paths and house geometry
5. Reception /WhatsApp NO. : +8618830120193Read more Nipple Drinker System Design | 5 Key Planning Tips For Farms1. Nipple lines require coordinated hydraulic planning across pressure, filtration, flushing, and suspension components
2. Bird access depends on correct drinking-line positioning throughout each production stage
3. Water quality should be evaluated before finalizing filtration and treatment equipment
4. Pipeline design should provide practical access for inspection and routine cleaning
5. Reception /WhatsApp NO. : +8618830120193Read more 7 Ways To Reduce Maintenance Costs For Pralson Feeders1. Pralson Feeders maintenance depends on correct installation and scheduled inspection
2. Automatic feeding lines require coordinated mechanical and electrical checks
3. Feed residue management supports consistent equipment operating conditions
4. Component records simplify replacement planning across production cycles
5. Reception /WhatsApp NO. : +8618830120193Read more 6 Practical Tips To Reduce Maintenance Costs Of Nipple Drinkers1. Nipple drinkers maintain controlled water access for poultry
2. Regular inspections prevent unnecessary mechanical service interruptions
3. Clean pipelines support stable equipment operation throughout production
4. Proper maintenance improves reliability across repeated flock cycles
5. Reception /WhatsApp NO. : +8618830120193Read more 5 Ways To Improve Pralson Feeder Reliability On Farms1. Pralson feeders distribute feed through coordinated mechanical systems
2. Regular inspections reduce unexpected operational interruptions significantly
3. Feed quality influences smooth equipment performance daily
4. Preventive maintenance supports stable production across cycles
5. Reception /WhatsApp NO. : +8618830120193Read more What Are The Installation Requirements For An A Type Battery Cage System? 6 Clear Guidelines1. Building dimensions determine the final cage-row arrangement and equipment positioning
2. Structural preparation provides the foundation for accurate cage assembly and utility integration
3. Feeding, drinking, manure, and egg systems require coordinated installation sequencing
4. Commissioning records verify mechanical movement, electrical connections, and water delivery
5. Reception /WhatsApp NO. : +8618830120193Read more Energy Saving Tips For Pralson Feeders | 6 Effective Methods1. Automatic feeders require coordinated electrical and mechanical settings
2. Feed distribution should remain consistent across line sections
3. Routine inspection helps identify developing mechanical changes
4. Flock growth requires corresponding equipment adjustment
5. Reception /WhatsApp NO. : +8618830120193Read more Commercial Battery Cage For Layers Vs Small Farm Cage | Which Should You Choose?1. Commercial layer cage systems optimize bird housing through structured engineering designs
2. Multi-tier cage layouts improve poultry house utilization with controlled equipment placement
3. Feeding systems support accurate nutrition delivery across commercial production areas
4. Manure management equipment maintains cleaner operational environments inside chicken houses
5. Reception /WhatsApp NO. : +8618830120193Read more Commercial Broiler Chicken Cage Vs Small Farm Cage | Which Should You Choose?1. Commercial broiler cages require accurate engineering calculations
2. Farm layouts influence equipment selection and production efficiency
3. Feeding systems connect with complete poultry management procedures
4. Cage structures support organized commercial farming processes
5. Reception /WhatsApp NO. : +8618830120193Read more Adjustable Vs Fixed Height Pralson Feeders | Which Reduces Waste?1. Adjustable feeders improve chicken house feeding management efficiency
2. Equipment structures support stable poultry production processes
3. Modern systems reduce unnecessary feed handling operations
4. Engineering designs improve farm operational consistency
5. Reception /WhatsApp NO. : +8618830120193Read more Electric Vs Diesel Pellet Machines | Which Saves More Energy?1. Electric pellet machines process feed materials efficiently
2. Diesel systems provide flexible operation options for farms
3. Energy selection influences poultry production efficiency
4. Feed processing requires stable equipment performance
5. Reception /WhatsApp NO. : +8618830120193Read more
Search
Hot product
 IoT Poultry Farming System1. CO₂ 0–5,000 ppm range
2. NH₃ 0–100 ppm
3. RH ±3%
4. Thresholds in the 10–25 ppm range
5. Reception /WhatsApp NO. : +8618830120193Read more Overall Structure IoT System In The Farm1. Breeding planning framework
2. CCTV
3. Poultry digital platform - comprehensive large screen
4. Alarm management
5. Reception /WhatsApp NO. : +8618830120193Read more Poultry House Environmental Control Smart IoT System1. Precision ventilation
2. Full site equipment control
3. Self diagnosis alarm system
4. European standard hardware
5. Reception /WhatsApp NO. : +8618830120193Read more

Contact us
Phone(whatsapp No. ):
E-mail:
Office 1 (Hong Kong):
Flat/RM A, 15/F, ManlyCommercial Building 15 Soy Street, Mong Kok
Office 2 (China Mainland):
Flat/RM 2416, 24/F, Runxing Building, Youyi Nan Street, Shijiazhuang City, Hebei Province